


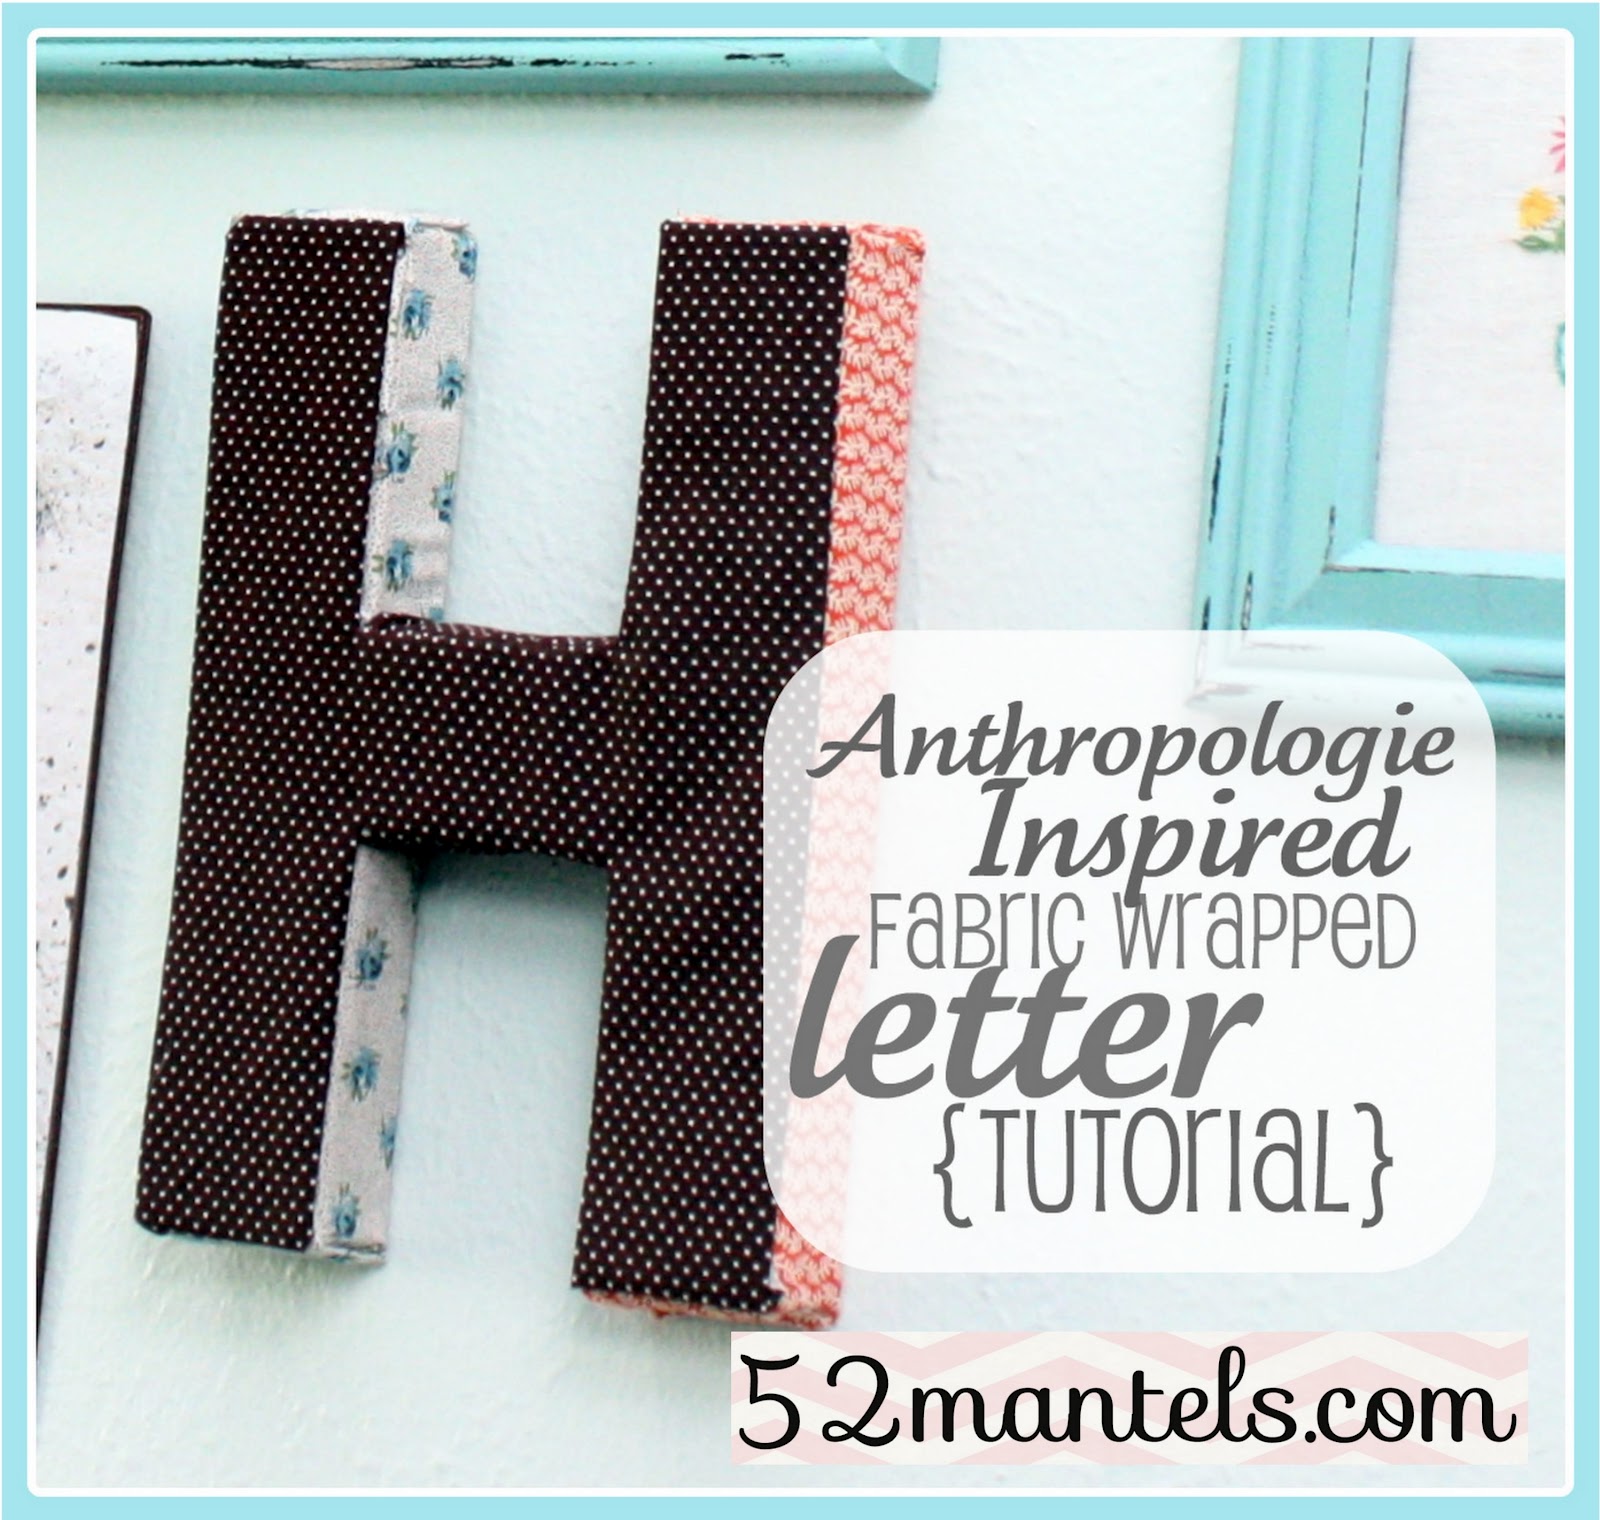
A couple weeks ago I shared my laundry room makeover with you and today I'm showing you an easy tutorial for the fabric-wrapped {Anthropologie inspired!} H from my W-A-S-H gallery wall. And, apparently Anthro no longer sell their fabric letters, because I can't seem to find an original picture to show you. But, gracious me, I sure found a lot of other knockoffs. So, if you hate my tutorial, do a little google search and you're sure to find one to suit your fancy ;)
Okay, let's get to it, shall we??

My letter was simple and without batting. Because, I had a lot of other projects on my to-do list that week and simple was key. But, feel free to work in some polyfil if you want. I don't mind.
1) Start with a cardboard letter (I got my H from Hobby Lobby). Trace the letter onto thin cardboard or poster board. This will be your letter front. 2)Take your cardboard H and set one leg on a scrap of fabric. Mark any areas that you won't be able to wrap. 3)Cut a notch in the area that you just marked. 4) wrap the fabric around the letter and hot glue to the letter FACE (you'll cover all the mess with your cardboard cut-out!) 5)/6)Clean up any exposed ends by folding a scrap of fabric and gluing over the seams. 7)Repeat this process with the opposite leg and then wrap a third fabric over the cross bar. 8)/9)Glue the ends down to the front of the letter. 10)Take your cardboard letter and lay it on the underside of a scrap of fabric and cut a 1/2 inch border around the entire letter, angling the cuts at the corners. 11)Wrap the 1/2 edge over the letter and glue in place. Flip your letter-face over and attach it to the front of the letter.


To see all the fun details of my laundry room makeover, click here. It's bright and cheerful because, don't I deserve a little cheer during all those hours spent laundering things?
Yep, I thought so too.


(Like what you see? Follow 52 Mantels!)


 Follow 52 Mantels by Email
Yep! I link up!
Great tutorial and your finished project is so pretty. Megan
ReplyDeleteSo cute! Makes doing the laundry a happy time!
ReplyDeleteI love how your tutorial has all the pictures together, with the numbered instructions. Super easy to follow along!
ReplyDeleteCUTE! Cute! CUTE! I L.O.V.E it! Excited about the party, too!!! I {heart} My Sister's Suitcase!!! Off to check it out! XO, Aimee
ReplyDeleteSo cute and I love that you kept it simple!
ReplyDeleteAbsolutely adorable Emily! What a precious wall you have created!! ;)
ReplyDeleteBonnie @ uncommon
www.uncommondesignsonline.com
Love how you did different treatments for each letter. Looks great!
ReplyDeleteI love your H. I'm going to have to pin it! Definitely on the list to make. I've nominated you for the Versatile Blog Award. Come by my blog to check out the details. http://www.lovebugliving.com/2012/04/versatile-blog-award.html Congrats!
ReplyDeleteMelissa
What a great tutorial Emily!!! The letters look FAB!
ReplyDeleteThanks so much for sharing at The DIY Dreamer.. From Dream To Reality!
LOVE this!!! Might just have to make one :)
ReplyDeleteDARLING!! Hope you can link this up to my turquoise lovin' party!! http://www.sweetlittlegals.com
ReplyDeleteI like it very much.
ReplyDeleteGreat tutorial!! I have some letters that I was contemplating on how to decorate them exactly... fabric, scrapbook paper, yarn, etc. I'm loving this idea so I think I'll have to give it a shot! I just hope I can make mine look as nice and neat as yours:D Thanks for sharing your tutorial!
ReplyDeleteThis comment has been removed by the author.
ReplyDeleteThis comment has been removed by the author.
ReplyDeleteOh Emily, keep it up dear.. You are saving me money by all these DIY projects specially ones from Anthropologie. I am doing my new home these days and will be following your steps.I am so new to this stuff..
ReplyDeleteDo come for laughs on my Anthro story @ my post http://couleurzncollection.blogspot.ca/2012/04/how-i-found-anthropologie-winter-dress.html
I love this!!! So pretty!
ReplyDeleteLove this idea! Featuring you today on Favorite Pins Friday!! http://www.waittilyourfathergetshome.com/2012/06/01/favorite-pins-friday-3/
ReplyDeletemichael kors clearance
ReplyDeletemichael kors outlet
ralph lauren pas cher
louis vuitton pas cher
nike air max
michael kors handbags clearance
michael kors canada
swarovski crystal
longchamp pas cher
michael kors uk
michael kors outlet online
swarovski crystal
coach outlet online
true religion canada
louis vuitton handbags
camisetas futbol baratas
michael kors wallet sale
soccer jerseys wholesale
chaussure louboutin
jordan shoes
discount michael kors handbags
michael kors outlet
birkenstock sandals
air force 1 shoes
nike mercurial
michael kors uk outlet
coach outlet store
adidas wings shoes
mbt shoes
true religion jeans
herve leger dresses
ralph lauren
soccer jerseys
mlb jerseys
cheap nfl jersey
20160321zhenhong
toms outlet store
ReplyDeleteyeezy sneakers
nike kobe sneakers
cheap oakley sunglasses
nike huarache
michael kors handbags
michael jordan shoes
nike huarache sale
michael kors outlet
michael kors outlet store
ralph lauren polo shirts
cheap jordans
tiffany jewelry
tiffany and co outlet online
http://www.raybanglasses.in.net
michael kors factory outlet
michael kors outlet online
cheap jerseys
ReplyDeletehermes handbags
coach factory outlet
burberry outlet
uggs
timberland boots outlet
canada goose outlet
timberland boots
longchamp outlet
nike free flyknit
zhi2016112
nike air huarache
ReplyDeletemichael kors handbags
cheap nike shoes
air max 90
ralph lauren pas cher
redskins jerseys
chaussure louboutin
cheap jordan shoes
michael kors outlet online
miami heat
cc0127
ReplyDeletepandora charms
doudoune moncler
hermes outlet
polo ralph lauren outlet
ugg outlet
cheap jordans
air jordan shoes
coach factory outlet
kate spade bags
oakley sunglasses
cc0127